
Remodel with Finished Stair Treads: Step-by-Step
Published: August 25, 2020
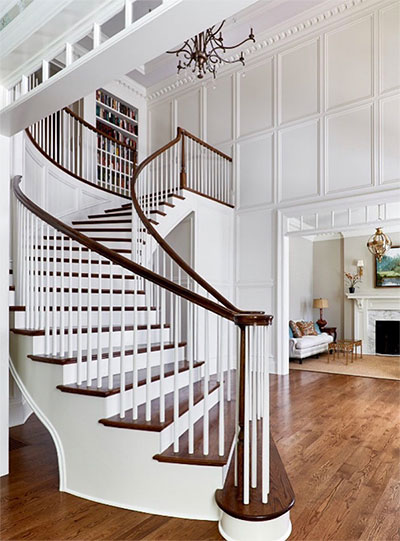
Are you transitioning from carpet to hardwood floors or are you just looking to update and replace the look of a stair case. Replacing stair treads can be a simple DIY solution with a big aesthetic upside. Solid wood stair treads are not a veneered or engineered material but rather a solid wood tread that will replace the existing treads instead of placing a thin veneer cap over top of the existing tread which alters the dimensions of the stairs which can cause a tripping hazard, these veneers are also made of cheaper material and likely won't last as long as a new wooden stair tread.
When replacing your stair treads you will want to measure each one as settling and other factors such as less than perfect workmanship in newer homes can cause dimension variations and things to come out of square. For example a tread could be 23-inches wide in the back but be 23-1/8 inches or worse in the front, because of this we recommend purchasing new treads that are slightly bigger so you can trim them to be an exact fit.
Installing a New Tread
- Check the stairs for any visible fasteners, and remove them if possible.
- Remove old tread.
- Slide a pry bar under the nosing of the tread you want to replace.
- Work the bar between the tread and the riser underneath it, pushing the tread up and away from any fasteners attached to the underside.
- Pull the tread away as completely and gently as possible, and remove any remaining nails and screws.
- Install the risers first to help with seating the tread properly. Apply wood glue to the stair frame and nail the replacement riser in place.
- Apply wood glue to where the riser and tread meet and nail the tread in place. Remember each tread can be different so make sure you are measuring each as you go
- Fill nail holes and sand your new treads and risers smooth.
- If not finished, varnish, stain or paint the new treads and risers.
Here are some Do's and Don'ts when it comes to replacing your stair treads
Do's
- Measure each step properly
- Use both adhesive and fasteners
- Work in order so riser, tread riser, and so on.
- Only nail into stringers and not risers
Dont's
- Don't use the stringers to level the treads, instead use the front edge of the risers as the tops of the stringers will rarely be level.
- Don't assume all treads and risers will be the same size
- Don't nail through the face of the tread into the riser, nails should always go into the stringers.
Build your new Custom Millwork and get a Free Instant Quote Today
Our state of the art designers allow you to design and build completely customized millwork to fit your exact needs.
Questions or concerns contact us contact us or via 412.641.0177 .
Build an Instant QuotePainting and Staining Wood Millwork: A Practical Guide
The finish you apply to wood shutters, doors, and cabinets determines both their appearance and their longevity. Whether you choose paint or stain, proper surface preparation is the foundation of a durable finish. Estate Millwork sands all products to 180 grit before shipping, providing an ideal surface for primer and topcoat application.
For painted finishes, start with a high-quality alkyd or shellac-based primer that seals the wood grain and prevents tannin bleed-through, especially important with species like Cedar and Mahogany. Follow with two coats of 100-percent acrylic latex paint for exterior applications, or a cabinet-grade enamel for interior doors and cabinets. Acrylic latex flexes with the wood through seasonal expansion and contraction, reducing cracking and peeling on exterior surfaces.
Stained finishes showcase the natural beauty of the wood grain. Oil-based stains penetrate deeper and provide richer color saturation, while water-based stains offer easier cleanup and faster dry times. After staining, protect the surface with a clear topcoat: marine-grade spar urethane for exterior applications, or a wiping varnish or lacquer for interior pieces. Recoat exterior stained surfaces every three to five years depending on sun exposure and climate. Interior stained finishes can last ten or more years before needing attention.
Design your custom millwork and choose from our finishing options:
Need Help?
Related Posts
Interior Cabinet Door Styles That Elevate Your Kitchen Or Bathroom
Published: November 12, 2025
Why Mortise & Tenon Joinery Still Matters in Millwork
Published: October 23, 2025
From Shaker To Raised Panel: Cabinet Door Styles That Transform Your Home
Published: October 08, 2025
How to Match Door & Shutter Styles for a Cohesive Home Design
Published: September 30, 2025
Choosing the Right Exterior Shutters: Louvered, Board & Batten, Bahama, and More
Published: September 25, 2025
The Warmth Of Wood: Barn Doors Tailored To Your Home
Published: September 09, 2025
Classic Style, Modern Strength: Custom Wooden French Doors
Published: September 03, 2025
Built By Hand, Designed To Last: Custom Wood Louvered Doors
Published: July 07, 2025
Flat Panel Shutters For Colonial, Craftsman, And Farmhouse Styles
Published: May 28, 2025
Bring Old-World Charm Home With Custom Wooden Louvered Shutters
Published: May 04, 2025